Showing posts with label Sunday baking. Show all posts

Monday, February 14, 2011

A Valentine Bouquet of Cheer

I’m up to my old tricks.

I volunteered to bake cookies for my daughter’s first grade class Valentine’s Day party and, well, you know me. I couldn’t just make cookies.

“Let’s do hearts and flowers!” my daughter said excitedly.

“No, let’s do a whole bouquet of hearts and flowers!” I responded. I don’t know why I egg her on. It always means more work for me.

We hadn’t done a large batch of lollipop cookies on sticks since her pre-school Easter basket. The cookies simply are cut-out shapes, but the skewers add another level of labor and a hefty opportunity for breakage. I felt rusty. And worried.

My daughter and I always work side-by-side when it comes to almost any sort of baking, and her little hands get into every element at every step. This time was no different. But the results were: She was very adept and surprisingly smooth with the dough, the icings, the sugars, the chocolate dipping and the final assembly. She was careful and precise with little guidance. What a difference from age 4 ½ to 6!

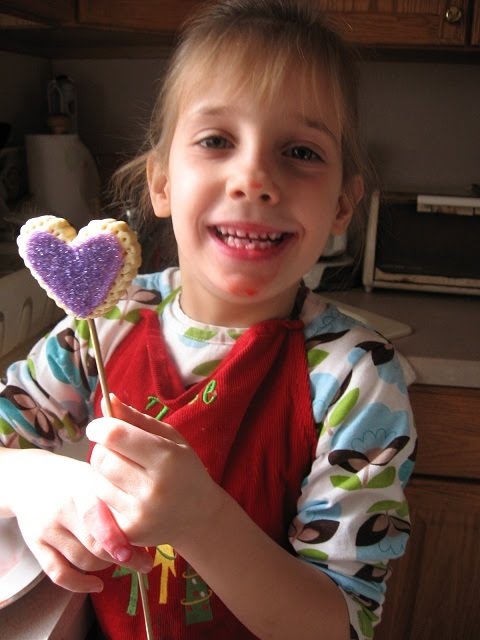
We made smooth-edged hearts and what I called “doily hearts” – which were lacey and charming. All we did was prick the edges of the dough with a toothpick before baking and Voila! It was a good idea that was super-easy and worked out very well. We iced and coated the hearts in red, violet and pink sparkling sugars and non-pariels, using décor left over from her party last week. We also made a separate “XOX” cookie for her teacher.

Did we stop there? Not on your life. We rolled out the remaining dough scraps and cut out small one- or two-bite hearts to be dipped in chocolate (her idea) and topped with a conversation heart (my idea). They were really cute, too!

We assembled the “bouquet” of hearts in a pink tub with red paper “grass”, laid the chocolate-covered hearts amidst the forest of sticks, then wrapped the entire confection in clear cellophane tied with a mass of curling ribbon in three shades of pink.

My daughter proudly carried it in to class on Monday morning, and rightly so.

She did a great job.

Elements, recipes, tips and techniques used can be found in a past entry, “Queen of Royal Icing.”

Thursday, February 10, 2011

Will You Be My Valentine?


A tornado of nine giggling, squealing first grade girls descended upon the house after school on Thursday, leaving a chaos of cupcake crumbs, sanding sugars, non-pariels, frosting, stickers, jewels, balloons, streamers and scattered conversation hearts in its wake.

My daughter and I threw a Valentine’s Day party for her friends.

I love Valentine’s Day, sentimental fool that I am. We came up with the idea in the icy, dark depths of January, when we were constantly snowed in and barely able to dig out at times. A blizzard of pink cheer was definitely in order. We decided on card making and cupcake decorating as activities. She and I started by making the invitations out of construction paper cut into hearts and glued onto pink poster board cut to fit some funky lined envelopes I had on hand. She decorated the invitations with foam hearts of all colors and ruby-red stick-on heart jewels for added bling. I addressed them in super-loopy curlicue script and sent them using “Love” stamps from the Post Office.

I should have known at that early point that we’d end up going overboard.

I transformed the dining room into an explosion of pink streamers, dangling hearts and red heart-shaped balloons, then set the table with pink plates and matching heart napkins and cups upon a pink disposable tablecloth. I framed the entryway with a glittery heart garland draped like a giant, metallic feather boa.

My daughter and I made chocolate-covered strawberries, mainly for the mothers to eat when dropping off and picking up their daughters. But they were devoured by all. I also put out some chilled Prosecco (Champagne entails just too many expectations) and foil-covered Swiss chocolate hearts and squares from Rohr for the adults.


With all that melting chocolate laying around, I got a little more ambitious: We used molds to make solid hearts and two-tone roses in both white chocolate dyed pink and dark chocolate. Selections of each were put into heart-covered cellophane gift bags, tied with a frizz of curling ribbon and placed into the larger pink paper goodie bags. I also tossed in a valentine’s candy necklace in each. My daughter begged and pleaded at Michael’s Craft Store to please, please, please buy the glitter heart wands because they were “covered in real fairy dust.” I did, and one went into each girl’s bag as well.

But honestly, the girls did all of the work and filled the bags with their efforts. The cards were a blank canvas, with a pink background and doily edge, and they turned out very well: the girls mainly made them for mainly for their parents or teachers and included lots of hearts, X and O kisses and hugs, and wrote loving sentiments. The girls worked very intensely and quite nicely together, cooperating, politely helping each other when asked, and sharing stickers and jewels. It was really quite sweet to watch.

Then all hell broke loose though after a break, during which the girls raided the princess dress-up chest while I set out the cupcakes and accoutrements. But what a riot!
My daughter and I pre-baked both chocolate and golden-butter cupcakes and turned – seriously - a half gallon of store-bought tubs of vanilla frosting into different colors. The girls got to decorate one cupcake of each flavor. Some had never used a pastry bag before, so there was a learning process and a lot of laughs involved. Cupcake décor included Sweet Tart conversation hearts, pink and lavender M & Ms, Jelly Belly jellybeans in all shades of solid and speckled pink, large heart-shaped Wilton sprinkles, edible pink pearls, a pink red and white non-pariel blend, electric pink, violet and red sanding sugars, Williams Sonoma gold and silver shimmering sugars over from Christmas and – how could I resist? – Maraschino cherries for those who wanted them on top. All were set out in bowls that criss-crossed the table, were shared, spilled, mixed together and eaten out of directly (that was the candy …)

The girls’ super-frosted delectables went into fuchsia and white boxes shaped like Chinese-food containers (thank goodness for the dollar store!), to maintain the integrity of the cupcakes. I suggested that the girls all take one to school the next day as a lunchtime dessert, to be part of “The Valentine’s Cupcake Club.” Within a split second, one girl said, "Um, no" without even looking up, and I was shot down. The others pretty much agreed with the "no." Forty years after I was their age, and Mommy is still a dork.

In the end, surprisingly few of the girls were in sugar-shock, and none of them wanted to leave. That was fine, since some of the mothers lingered over a glass of Prosecco. Thankfully, the mother of one of my daughter’s best friends came over to help with the insanity, and we both needed a glass by the end of the party!

I sent the girls off with their goody bags and their choice of balloons from the house, fed my daughter dinner, cleaned up and nearly collapsed.

But amazingly during her evening bath, my daughter and I started planning her next event.

We can’t wait!

Wednesday, August 11, 2010

Peach Picking

And more crucially, peach pie making!

We went peach picking over the weekend at a nearby farm. It was tremendous fun, and we must have picked a peck of ‘em. But I was transported into another world.

I was utterly captivated by the orchard, the soft and glossy leaves, the arching canopies of perfect peaches above, each peach more blushing and beautiful than the next. It was odd in a way. I’ve been apple picking and to farms many times before, but there was something almost unearthly about being there. I could have meandered all day, unaware of the time or any other being around me, wandering from tree to tree as the perfume of the ripe fruit and rich earth enveloped me.

I did, however, have my daughter with me to bring me back to earth. She started strong, respected the trees, and knew to twist the fruit just slightly in order to pick it and not damage the branch. Mike tends toward the orange peaches and took his time filling the bag given by the farm with our tickets. I wasted no space for them in my bag, and waited patiently for us to reach the white peach grove just down the hill. I couldn’t fill the bag with enough, it seemed. In the end, I think Mike, my daughter and I ate her weight in peaches before riding back on the tractor-rig. The sticky, dribbling juice on our chins and collars was a dead giveaway.

Once home and out of “context,” what seemed like an OK amount of fruit in the orchard turned into four insurmountable mountains of peaches that consumed the kitchen counters. We gave some to all the grandparents, ate a few more after Saturday dinner, sliced some at breakfast on Sunday, but were still left with a ton of fruit.

“Make a pie already!”

I think Mike expected one to magically appear from my oven the second we arrived home on Saturday afternoon. Good things come to those who wait: it was a warm and juicy midnight snack on Sunday night when Mike came home from a late news shift.

The ripe peaches peeled perfectly. Use the same process as for peeling tomatoes: shallowly score the bottom with an “X” . Briefly plunge them into simmering water. Remove, cool momentarily and slide the skin off.

As outlined in Pie 101, I flavored this crust with some cinnamon, doused the peaches in honey-bourbon, added the requisite cup of solids and made a lattice top. Baked peaches can be even more flavorful and concentrated than they are eaten raw.

We still have a lot of peaches left. We have a tentative get-together planned later this week, and if it comes together I’ll do a sponge base drenched in Amaretto simple syrup, a vanilla bean pastry cream (or maybe I’ll simply flavor some Mascarpone cheese), and sliced peaches overlapped in a radiant sunburst. A garnish of toasted, slivered almonds is optional – I’ll see if the mood strikes me. There’s no hot oven heating the summer kitchen involved in that one, and the peaches are ripening and sweetening as I type. Imagine what they’ll be like by the weekend.

Tuesday, January 19, 2010

Opera Cake

Quail and Cornish game hens be damned! The hit of the night was dessert.

The presentation of the glistening little birds ringing a large platter was impressive with additional walnut stuffing mounded in the center. The fruit and wine reduction sauce was velvety smooth. Since fig balsamic vinegar went into the sauce, I made a fig balsamic vinaigrette for the salad, and gave the option of adding the toasted walnuts and chevre, which were out for appetizers. I’m glad I was inspired to change at the last minute. The flavors really dovetailed all around, from soup to nuts – well, from appetizers to the repeated use of the walnuts.

But in the end, it was the Opera Cake.

“Elise, this is the best thing I’ve ever eaten here,” my father-in-law gushed, adding that anything he’s “had at Latour doesn’t even compare.” [A restaurant in Bergen County]

I delivered two slices of the cake on Monday morning to my best friend, who at the last minute could not attend. I felt like the Easter bunny, hopping up to her back door and hanging the gift bag on the doorknob early in the morning. Once she found the surprise, she called immediately, confessed that both pieces were gone, and that she’d be “out of commission for the next two hours” on her Wii Fit.

It is a beautiful and tasty cake to say the least, with a 100+ year history. But honestly, it looks a lot harder to make than it is. Sure, there are a number of components, but if you break them down empirically, it’s Pastry 101 (maybe Pastry 201): sponge cake, simple syrup, icing, melted chocolate.

My five-year-old daughter was there every step of the way with a very active hand, and it came out great.

Here is a link to the recipe from Gourmet Magazine, September, 2004 issue. Good luck, and enjoy!


Wednesday, December 30, 2009

Mom-Mom’s Pastry Cookies

Some things you want to make. Some things you have to make.

It is the kind of dough that mocks you from the dark depths of the fridge as you chill it. “I dare you.”

Well, it did that this year.

Every Christmas, my grandmother used to make what my mom called “The Hungarian Pastry Cookies.” We are not Hungarian. I’m not sure of the origin of this recipe, which at this point consists only of a list of ingredients, one noted direction and a temperature [but no baking time] I scrawled one year on a sheet of reporter’s notebook paper. I did learn this year that when my mother was a child, “Mom-Mom and Nanny [my great great aunt] used to spend a day together, making apricot filling, drinking the apricot brandy, rolling them in powdered sugar over and over again.”

Now, you all know I’m all for a sip or two of brandy anytime, but this is one baking project where a clear head is clearly needed.

I never saw my grandmother make them. I have no instructions, but I’m the only one in the family who knows how to make them. Or is willing to.

So I did again this year.

It is a tender pastry dough, not to be overworked, and quick to turn sticky once your rolling pin hits it. To be honest, though, I’ve never had a problem with it, not even the first year I attempted them. I did this year, though.

As I previously wrote, it was the final batch of dough made that Sunday night after the weekend snowstorm and a few days before Christmas. Perhaps it was the long days and late nights I’d put in, but once the dough came together in my mixing bowl and I went to pre-roll it into 16” x 16” x 1/8” sheets, it stuck to my fingers, it glued itself to the waxed paper, it melted and tore into holes in spots.

Back to the fridge to chill. Then it still didn’t behave. I had to call it a night eventually, but not until I showed the dough who’s boss.

It showed me instead.

All week, I silently checked it as it silently sneered back at me. For the first time, I was not looking forward to Christmas Eve Day, when I make the cookies to be delivered warm out of the oven that night, then still fresh for the extended family on Christmas Day. I could not not make them. That was not an option.

I held my breath that morning, banished all from the kitchen counter and went to work. Not “slowly but surely,” but quickly and efficiently. I gave the dough no excuse to gloop up on me. Using a ruler and a pizza wheel (or razor sharp knife), I cut each pre-rolled super-chilled sheet (my secret, shhhh) into sixteen 2” squares. You then put a dollop of filling in, fold over the edges, quickly evacuate them to a cookie sheet, then say a Hail Mary as you slip them into the oven.

Fillings this year were prune (my favorite), apricot (family favorite & the tradition) and date. In years past, I’ve made a wonderful “stew” of dried figs and star anise. That was absolute blasphemy the first year I did it, as I’d forsaken the walnut filling my grandmother used to make. But everyone ate them then and in subsequent years.

Actually, I observed something this year that I’d seen in the past, but didn’t fully, duly or officially note.

Mom-Mom’s cookies are the first thing every member of my family takes when they arrive. My younger sister, who hosted Christmas this year, puts together quite a spread of appetizers and nibblies no matter what the occasion – pretty much anything and everything any guest could want. But my cousin Craig walked in after a long drive from Pennsylvania and took an apricot cookie – before barely a “Hello.” Ditto for cousin Alicia, even after assaying the table covered with cheeses, dips, crudité, chocolates, etc. My mother’s brother, Vic, makes no false pretenses or apologies: he pours a glass of milk and sits down right next to the cookies for as long a spell as it takes to relive childhood. My father made a beeline for the prune filled cookies. My mom, surprisingly, tried a date-filled cookie first.

“Delicious, good idea Elise,” she said. “But didn’t you make the fig this year?”

Wednesday, December 23, 2009

An Old Favorite for An Early Christmas

They say the holidays come earlier and earlier each year. We had our first Christmas of the season two days early, on Wednesday.

A special friend and I wanted our own Christmas to exchange gifts and had theoretically planned it pretty much since Halloween. I figured it would be a short quiet time together, maybe at home, over dinner in a restaurant, or at our favorite bar if need be. It’s not always easy for either of us to steal time away from home. But she is near and dear, as is every moment together.

In the end, she decided to make a full turkey dinner with trimmings and invite both me and my daughter over to celebrate with her family (my husband was working). Dessert? Quite a spread of cookies, courtesy of you know who.

I took such great pleasure in putting together these treats and chose a favorite green Depression glass dish to use. The flavors, the colors, the composition – I’m grinning ear to ear just thinking about it and the wide eyes that greeted the cookies once unveiled. She knows I like to bake and create and has tasted the fruits of my labor before, both savory and sweet. But never did she expect the variety or the surprise of one of her favorites: the tri-colored Italian cookies. They are my favorite cookie as well.

Served with a little Asti (one of her favorite drinks, another surprise I brought), the cookies were the perfect accompaniment nibble by nibble to our gift giving, creating one of the warmest, sweetest Christmases in recent memory.

This is the most wonderful time of the year.


7-Layer Italian Cookies
Gourmet Magazine, December 2005
4 large eggs, separated
1 cup sugar
1 (8-oz) can almond paste
2 1/2 sticks (1 1/4 cups) unsalted butter, softened
1 teaspoon almond extract
2 cups all-purpose flour
1/2 teaspoon salt
25 drops red food coloring
25 drops green food coloring
1 (12-oz) jar apricot preserves, heated and strained {you don’t need this much)
7 oz fine-quality bittersweet chocolate, chopped (best, darkest you can find; use extra if desired)

Put oven rack in middle position and preheat oven to 350°F. Butter a 13- by 9-inch baking pan and line bottom with wax paper, leaving a 2-inch overhang on 2 ends, then butter paper.
Beat whites in mixer fitted with whisk attachment at medium-high speed until they just hold stiff peaks. Add 1/4 cup sugar a little at a time, beating at high speed until whites hold stiff, slightly glossy peaks. Transfer to another bowl.

Switch to paddle attachment, then beat together almond paste and remaining 3/4 cup sugar until well blended, about 3 minutes. Add butter and beat until pale and fluffy, about 3 minutes. Add yolks and almond extract and beat until combined well, about 2 minutes. Reduce speed to low, then add flour and salt and mix until just combined. Fold half of egg white mixture into almond mixture to lighten, then fold in remaining whites gently but thoroughly.

Divide batter among 3 bowls. Stir red food coloring into one and green food coloring into another, leaving the third batch plain. Set white batter aside. Chill green batter, covered. Pour red batter into prepared pan and spread evenly with offset spatula (layer will be about 1/4 inch thick).
Bake red layer 8 to 10 minutes, until just set. (It is important to undercook.)

Using paper overhang, transfer layer to a rack to cool, about 15 minutes. Clean pan, then line with wax paper and butter paper in same manner as above. Bake white layer in prepared pan until just set. As white layer bakes, bring green batter to room temperature. Transfer white layer to a rack. Prepare pan as above, then bake green layer in same manner as before. Transfer to a rack to cool.

When all layers are cool, invert green onto a wax-paper-lined large baking sheet. Discard paper from layer and spread with half of preserves. Invert white on top of green layer, discarding paper. Spread with remaining preserves. Invert red layer on top of white layer and discard wax paper.

Cover with plastic wrap and weight with a large baking pan. Chill at least 8 hours.
Remove weight and plastic wrap. Bring layers to room temperature. Melt chocolate in a double boiler or a metal bowl set over a saucepan of barely simmering water, stirring until smooth. Remove from heat. Keep chocolate over water.

Trim edges of assembled layers with a long serrated knife. Quickly spread half of chocolate in a thin layer on top of cake. Chill, uncovered, until chocolate is firm, about 15 minutes. Cover with another sheet of wax paper and place another baking sheet on top, then invert cake onto sheet and remove paper. Quickly spread with remaining chocolate. Chill until firm, about 30 minutes.

Cut lengthwise into 4 strips. Cut strips crosswise into 3/4-inch-wide cookies.

Monday, December 21, 2009

Stained Glass Cookies

Let the games begin!

We’ve completely hunkered down in the trenches of Christmas cookie production. Starting Saturday afternoon as a snowstorm blew through the Northeast, my daughter and I made the following doughs:

- Sugar Cookies, to roll out and cut into shapes;
- French Chocolate rimmed in white non-pariels, a slice and bake variety;
- Pfefferneuse, to roll into balls and bake;
- Fig, raisin, bourbon and chocolate filling rolled into a spiral, to slice and bake (an invention this year of random ingredients);
- Gingerbread, to roll out and cut into shapes.

I added a sixth on Sunday night after putting my daughter to bed, when I made my grandmother’s tender pastry dough. These will be filled with apricot, prune and date fillings this year.

Do you think six varieties are enough? Is this a sufficient head start? There is a method to my madness.

Any doughs that can be refrigerated to make cut and slice, rolled and cut, or balled cookies are done first and set aside in the fridge for future use. This can be extremely convenient if done early enough, since you can bake a batch of each or any on short notice, or break off just what you’re yearning for when you simply want hot, fresh cookies at midnight with a glass of warm brandy. ‘Tis the season, you know.

In the coming days, I’ll tackle (with glee!) three-layer Italian cookies, a two-day process, almond macaroons (recipe here), dark chocolate-dipped icebox cookies dusted with pulverized peppermint sticks, and my own mixed-fruit biscotti.

By Sunday night, my first batch had already come out of the oven. Well, two actually, if you count the army of little gingerbread men I baked for good measure, and because my husband devours them.

I used my standard sugar cookie dough (recipe here) to create stained glass cookies – easy, glistening and impressive – for my daughter’s kindergarten class. The only extras you need are hard candies and nested cookie cutters.

I prefer individually wrapped Life Savers for this cookie. They come in a variety of colors, one candy perfectly fills the opening, and each comes in its own pouch. Crack and break them up with a hammer or mallet, being careful not to break the cellophane wrap. When you’re ready, just open the pouch and pour the candy into the cookie holes.

Roll the dough to at least a ¼ inch thickness. Cut your desired large shapes, place on a cookie sheet, then cut out your inner shape. Bake as directed. The crushed candies melt into “glass,” filling the inner shapes of the cookies. Ice or decorate as desired, or leave plain. Save the inner shapes to eat plain or decorate as one-bite treats. Accumulate and bake them on a separate pan, since they take a shorter time in the oven than the larger cookies.

I purchased one bag of mixed Life Savers and one bag of Butter Rum flavor. The mixed colors worked on the trees (green), snowflakes (white), some stars and angel “ornament” balls (red); the butter rums made for great gold stars and angels.

The little gift bags tied in a frizz of curling ribbon were a hit with the kids, since I also added the iced and sugared center shapes, some candy, and a gingerbread man to each.

Try these cookies this season, perfect your process, then make them on Valentine’s Day using heart cutters and red candies.


Let's just get past Christmas for now.

Thursday, July 16, 2009

Pie 102


I took my own advice from Pie 101 and made a blueberry pie last weekend. How could I not? I came into a flat of Jersey blueberries for only $6 on Friday.

I washed and picked over three pint containers of berries – there wasn’t a bad one in the bunch or a single green berry – let them dry and put together my scant cup of solids: three heaping tablespoons cornstarch, a pinch of salt and white sugar. I sprinkled that over the berries then added the zest of a lemon. There was, as usual, no time involved, but a ton of flavor resulting.

The only time consuming part, if you could call it that, was creating the lattice top. The first time I made one, years ago, was a patchy mess without fully weaving the strips of pastry dough in and out of each other. After a while, I just laid them slap on top of the fruit. I prefer not to remember that incident. However, with good, chilled dough and a pizza wheel or pastry cutter to make strips, it’s not that difficult to achieve attractive results.

Once done, brush the top with melted butter, an egg wash or heavy cream, then sprinkle with turbinado or any large-crystal sugar.

Friday, July 10, 2009

Pie 101


The Fourth of July may be as American as apple pie, but we made rhubarb. It was fresh, tart and beyond delicious. We basically picked the rhubarb and put it into the pie pan, adding a few strawberries for good measure.

There is no mystery about pie, and no wondering about where the saying, “Easy as pie,” came from. But just in case nobody ever told you, here is Pie 101:

Cut more fruit than you need to fill your pie pan.
Add a spritz of acid.
Stir in about one cup of solids.
Bake until done.
That’s it.
Period.

Pies are easy and pretty much foolproof. Don’t drive yourself crazy with long recipes or loopy lists of ingredients. Use volumes of fruit that is fresh and available, and whatever appeals to you in any combination.

The cup of solids consists of a few tablespoons of cornstarch or flour to thicken the juice and hold the pie (somewhat) together; white sugar, brown sugar or both; a pinch of salt; a spice if desired, or any combination thereof. Dot the top with butter, if desired.

For this deep tart, my acid was lemon juice. Use lemon juice for apple pie, too, as it also reduces browning. The solids were a 2:1 mix of white sugar to brown with a dusting of cinnamon, and only a very scant cup. I wanted this tart tart.


Each summer when I come into a bale of peaches about to go south, my cup of solids contains more brown sugar than white, plus nutmeg. Cinnamon is good, too. My choice of acid is bourbon, and be generous with it when dousing the pie and when dosing the chef.

Cherry pie can be zipped up with lime juice and a little zest – an unexpected twist, like a Cherry-Lime Rickey. Or use a bit of almond extract while using this chance to integrate toasted slivered almonds into the pastry crust, sprinkling the remaining almonds on the top. Make a lattice top crust for this one. You could also try the almond variation with peaches or apricots.

Combinations are endless, but the procedure is easy and the same for each creation. Fruit is just so delicious, varied and plentiful this time of year. I hope you’ll try it.

Tuesday, June 23, 2009

An Apple for the Teacher

It was my swan song, but it could have been my Waterloo.


Pencil shaped cookies bearing the names of every student in my daughter’s pre-school class. Her graduation and show took place Monday night and I worked off and on through the weekend to make them. For good measure, I also added sparkling red apples with fondant leaves and diplomas tied in shoelace licorice to the mix.

They wowed the crowd. Plus, each of the kids over the school year had learned to recognize or read his or her name. So after their little show, the kids made a squealing scramble to claim their cookies. The large tray display looked like that for inside of two minutes once the kids got to it. It was great to see them so excitedly claim each name. Then the parents picked it clean.

I didn’t have a pencil-shaped cookie cutter, and looked high & low for one to no avail, but I could not let go of this named-pencil idea. So I used a clear ruler from my sewing and pattern making supplies and a pizza cutter to make 6” x 1” rectangles. (See Below) A sharp knife shaped the tips.

All remaining elements, recipes, tips and techniques used can be found in a past entry, Queen of Royal Icing.

Tuesday, June 16, 2009

Army of Mice

Am I becoming kitschy in my old age?

Perhaps I’ve just been having more fun with my food lately. First, it was the fish mold. Last weekend, it was an army of mice: chocolate covered strawberries with two beady eyes, jelly bean ears and licorice whip tails. My daughter and I had a heckuva fun time putting the display together as a surprise treat for her nursery school class.

It was just a fun thing to do for Sunday Baking, and I’m still not quite sure how we came up with the idea. But apparently the “theme” conveniently coalesced with the recent curriculum: Ancient Egypt.

While we were dipping and decorating, my daughter mentioned, “Did you know that cats drove all the mice out of ancient Egypt?” She then continued to inform me that cats were revered and celebrated throughout the ages through art, hieroglyphics and bejeweled statues. She is four.

I love that school.

So we put a cat figurine in the middle of the tray for effect when we finished, then laughed and licked all of the bowls and utensils clean.

Tip: I like to pulverize the chocolate either in the food processor or with a mallet to speed (and ease) smooth melting in the scant amount of hot cream used.

Saturday, April 11, 2009

The Queen of Royal Icing


Once again, I am one step closer to being crowned the Queen of Royal Icing. My daughter and I created a menagerie of chicks, lambs, rabbits and ducks in a grass-filled Easter basket, with spring tulips rising in the background and colorful eggs scattered around the grass.

These are the kinds of cookies that the kids love, but the mothers hate you for making. I do them with relish for the former and with wicked pleasure for the latter. And this Easter was no different.

While my daughter and I put together quite a batch for her pre-school class for Valentine’s Day – all manner, colors and sizes of hearts, plus X and O letters, and Hello Kitty faces – I thoroughly enjoyed making an Easter Basket with the cookies on sticks. The colors are soft, the shapes are charming and the chicks on sticks always crack me up. I'm not sure why! Our menagerie in Easter grass thrilled one and all at her school.

Working alone, I can usually do this relatively neatly with near picture perfect results. Working together, my daughter and I made a huge mess, used seemingly every shallow bowl and saucer in the kitchen, scattered non-pariels and sent dragées plinking and rolling into kitchen crevices that I never knew existed and ended up with dried royal icing spackling utensils, pastry tips and twist-ties to the countertop.

In other words, we had a ball.


Cookies:

1C Unsalted butter
1C Sugar
1 Lge egg
1 tsp vanilla
2 tsp Baking Powder
½ tsp salt
3 C Flour

Blend ingredients from top to bottom as you would for cookies. Separate and flatten into two disks and chill. Roll and cut. Bake @ 350 for 8-12 minutes, depending on your cookie cutter size.

These are not my favorite cookies for taste, but the dough really holds the cookie shapes while baking – very little spreading or puffing if at all. You may also make chocolate cookies with the same good baking results by swapping ½ cup cocoa powder for ½ cup of the flour. I tend to make at least half the batch chocolate at Halloween for black cats and bats. Also, if you do them on sticks, soak the skewers in water for at least 20 minutes to prevent scorching. Insert carefully and bake as directed.


Icing:

3 Tbs meringue powder
4 C Confectioners sugar
[up to] 6 T H2O

Blend 6-8 minutes using a standing mixer; longer with a hand held.

Divide the white icing according to the number of colors you’ll be using. Spoon icing into piping bags fitted with your needed tips for outlining, leaves, stripes, flowers, etc.

**While working, cover the bowl with a damp paper towel.

For outlined cookies, use “pipe and fill.” Using a #2 tip, pipe a color around the edge(s) of your cookies. Fill in with thinned icing of a different color.

You can use the “thin and dip” technique by spooning the needed amount of icing into a shallow dish or saucer, then stirring in a few drops of water to reach the desired consistency. It takes some practice – the icing can’t be too thin. There’s a fine line.

Alternatively, add a scant few drops for what I call “dip and spread.” Using thicker icing, dip the cookies face down then spread the icing to the edges using an offset spatula or even a butter knife.

Tuesday, April 7, 2009

Cannoli 18 Ways


I came into cannoli shells last week, both small and large, at 25 cents and 50 cents per box, respectively. There’s nothing wrong with them, the boxes aren’t dinged, nor are they even near their expiration date(s). I suppose the store was just clearing out stock of an item they may no longer carry. So did I ever stock up! Over the summer, I plan to dip some shells in chocolate and fill them with ice cream or sorbet.

But for now, I had ricotta on hand from last week, so cannoli was naturally our Sunday baking project. This recipe will fill a heckuvalot of mini shells, which is good because I have a heckuvalot on hand. This recipe can easily be halved, or doubled if you are baking for an army. And hey, I’m Italian, so I always make enough for an army anyway.

1 pound ricotta cheese, drained (about 2 cups)
Up to 1 cup confectioner’s sugar (I use a generous half; we don’t like them overly sweet)
The scraped contents of half a vanilla bean
Good pinch of fresh orange zest

Blend together all ingredients very thoroughly but gently. Add ingredients (see below) according to your tastes or needs. Spoon into a pastry bag fitted with a wide tip and chill, or chill in the bowl.

Spoon or pipe into prepared shells. I used a large, star tip [6B] on these. As usual, it was nearly impossible to pry it from my daughter’s little hands. Dust with powdered sugar and serve immediately. Refrigerate leftovers.

I like freshly made cannoli, so try to pipe filling into only what you’ll need. The filling will keep for up to a week in the pastry bag for future and/or other use.

Divide the filling in half or thirds if you want more than one kind on your dessert tray, or if you simply want to try some variations:

Chocolate chips. Tiny, mini-chips folded into the filling are pretty traditional, then sprinkled on the ends of the filled cannoli. I like to use good quality bittersweet chocolate shavings instead, and usually have a bar on hand. The shavings melt in your mouth.

Citron. My daughter likes this stuff, so I chop it fine and fold it through the filling. I’ll mainly do this during the holidays, when I tend to have those gelled cubes of red, yellow and green-dyed peels.

Orange Zest. You can go heavy on it if you like, keeping in mind that a little does go a long way. Mine this time were quite orangey, a nice surprise and refreshing variation on what can be overly sweet when store-bought.

Lemon Zest. Ditto. You can also add a tiny drop of yellow coloring to help identify the lemon cannoli in the bunch – a pretty touch for Easter.

Nutmeg. Blend a generous pinch of nutmeg and omit the citrus. Nutmeg and Italian just go together, sweet or savory.

Cocoa. Blend unsweetened cocoa powder into the filling for chocolate cannoli filling. Dust with powdered sugar and cocoa powder once filled.

Almonds. Fold in finely chopped, slivered toasted almonds and a touch of almond extract. Sprinkle with slivered almonds to garnish.

Pistachios. Ditto, and dye the filling green – a little dab’ll do you.

What to do with watery filling:

This happens. All is not lost. This is a happy mistake and an opportunity to experiment with a still-tasty filling, just one with a different consistency. Make any of the following and no one will suspect the cream was meant for any other use.

Make choux pastry puffs. Cut them in half, fill the bottom with your cannoli cream, top with a chocolate-coated upper half of the choux, then soak in a mixture of dark rum or amaretto and simple syrup.

Make mini-babas, cut them in half, fill with your cannoli cream, then drizzle the dark rum/simple syrup mixture over the entire batch for Babas au Rhum. Sprinkle with non-pariels. Replace the rum with straight limoncello taken right from the freezer, no simple syrup required. Garnish with powdered sugar and fresh mint – it’s summer on a plate.

I have a wonderful cake pan with an indentation that allows for a filling – I use it a lot in the summer when fruits are juicy and plentiful. Bake a basic sponge (3 eggs, ¾ cup sugar, cup flour), then soak the sponge in your choice of liqueur and simple syrup. Pour the cannoli cream into the well and top with chocolate curls. Or top with strawberries, amaretto-soaked apricots, toasted slivered almonds – your choice.

Slice and/or macerate summer fruit, layer one inch at the bottom of a champagne flute or parfait glass, top with a spoonful of your cannoli cream, and repeat until you reach the top of the glass. Try this with macerated strawberries and a drizzle of aged balsamic atop the dessert.

You could also try to recover the filling by placing it in a double-boiler, adding a tablespoon or two of cornstarch, and heating gently but thoroughly through, stirring occasionally with a spatula. It will still seem watery in the double boiler while warm, but let it cool a bit, spoon into your pastry bag with the tip covered, and refrigerate overnight. The filling should be more solid and ready to go in the morning.


FoodBlogBlogTotal Blog Directory

Monday, January 12, 2009

The easiest dessert ever: Macaroons

January 11, 2009

A snowed-in Saturday followed by pelting ice overnight made for a dangerous Sunday of chipping, slipping and sliding. We were not going anywhere for the second day in a row. What to do? What to make? And without any trips to the store for additional ingredients?

Macaroons. All you need is a can of almond paste and an egg white.

Preheat your oven to 325 degrees.
Blend almond paste with ½ cup of white sugar until uniformly fine.
Add one large egg white (although I like at least 1 ½) and beat until the mixture is sticky. Do it for at least two minutes, which will incorporate air into the mix.


Spoon onto lined (foil, silpat, parchment, whatever you use) baking sheets, or use a pastry bag with a wide tip. I used a 6B for these. My daughter is a maniac with a pastry bag. I’m lucky to even touch it at times.
Bake for 20 minutes, rotating your pans halfway through, then check for doneness; they should be light and golden.
I made little bite-sized cookies, 28 in all. They needed only 20 mins.
Larger macaroons will take longer, so rotate the pans and bake for another 5-8 mins. if necessary.
Slide the linings off the pans and allow the cookies to cool. Carefully peel them off your lining.

And as always, I can’t leave well enough alone. Apparently, neither can my daughter, although her choice of bright pink sanding sugar sparkled so cheerfully. She also exercised a surprising amount of restraint when sprinkling the cookies before baking [see pic]. We ended up with three kinds today: plain, chocolate dipped, and chocolate dipped with toasted, slivered almonds. I toast any and all kinds of nuts, which really brings out the flavor. We used an 85% cacao bittersweet chocolate bar for melting, which was included in a Godiva gift basket we received at Christmas. I had never used the Godiva brand for melting or baking before, and was pleased with the results.

[Now I’m thinking about doing a treatise on baking and melting chocolates. Or would that be a dessertation?]

So far as other additions go, add the traditional fine coconut flakes (toasted or plain) just before beating in the egg white.

Blend a few tablespoons of good cocoa powder into the ½ cup sugar for chocolate macaroons.

Add orange zest to your bittersweet chocolate if dipping or drizzling.

Top with a candied cherry or other fruit or décor if you’d like.

Re: Almond paste. This is not marzipan. I like Solo (as shown above), which comes in an 8 oz. can and is consistent in quality and dependable. Paste in a tube is fine, too, but that tends to be a 7 oz size. It will work fine as well in that quantity w/o adjustments to the other ingredients.